Friday, 8 December 2017

2017 Christmas card making series #1-3

Hi! Christmas is coming! 
I just started to make christmas cards recently, 
and Here is my videos that I made to share while I am doing it!

there is more to come! 
Here it is!


And this one is a bonus. :D


Hope you enjoy it!!
Please subscribe to channel if you like it! 


Wednesday, 13 September 2017

Unky's Colouring Therapy- Season 3 Episode #1 - Aurora 'Pug Rule'


Hi! It has been over a year for me to upload a video.
I was doing a commission work for Heather and I thought it would be fun to record colouring and so,
I came back with Season 3.
We are starting off with colouring Aurora 'Pug Rule'
As a celebration for season 3 launch, I would like this digi to be affordable as $1 until end of Sept.


I have prepared colouring contest for you to join and have a chance to win more digis :)
FACEBOOK GROUP : https://www.facebook.com/groups/TheEastWind/

In this video I am using copic markers, chameleon markers, faber castell polychromos colorpencils and sakura gelly roll for highlights.

Enjoy!

Thursday, 16 March 2017

Dream Frying Pan


Dear Crafters.

Two days ago, I was trying to fry some French Toast in the morning. and I was horribly failed. My non stick pan is super stick pan. It sound stupid to have sentimental about pan but I was looking for a pan that last long for many years, expensive or not. I always end up fail to cook an egg at one point. So I did more digging on google. :) and I found some people mention about 'well seasoned' carbon steel pan. What does it mean? Seasoning frying pan? so I did a bit more digging and it is some sort of process of heating and applying oil. So, I bought a carbon steel wok from Taiwan and a crape pan. That is all I could find from local kitchen shop. The thing about this Taiwanese wok, I had to heat up the wok then wipe out the protection lacquer.... I end up grilling wok sticking in my fire place and also long time scrubbing removed it and managed to season the wok for the first time! 

Then next morning, I was dreaming of my dream frying pan that we (me and frying pan) will go long time cooking together. and I decided to draw something about it. and also share with you. I know that a lot of you are moms like me who have special relationships with your kitchen. So I had that dream pan drawing in my head and finally drew out tonight. I want to offer this digital stamp / colouring sheet with you. It is about your and my dream frying pan.

Do you have a wonderful story about your relationship with frying pan? I know it sounds silly but I would be so interested to hear from you too!  comment or you can email me at info@unky.ca 
and Please, if you think this drawing is cute ? Please share the post with others :) 


Tuesday, 18 October 2016

Unky's Colouring Therapy Season 2 - Episode #9 - Thorns N Roses - Colouring Roses.


While I still have this digi 'Thorns N Roses' for Just 1$ ~ end of OCT.  as a 'TREAT'

SHOP HERE-> 'Thorns N Roses' 

I have a 'Trick' for you. How I coloured Roses with copic. 


Enjoy Watching :) 

Thursday, 14 July 2016

Unky's Colouring Therapy Season2 -'Underwater background'2 - Aurora 'swim with betty'


Hi Ladies, Today I wanted to share another video colouring underwater scene background.
I hope you enjoy the video! 
I break down a little explanation step by step for you


First the Digi I used.
Aurora 'Swim with Betty'


STEP 1

BG10, BG13, BG15, B21, B23, B26, B41, E00

I used aqua blue for the surface of the water, and Cobalt blue for the deep far end. I think whatever blue you use, lighter on the surface of the water, then it goes darker in the middle. then lighter in the bottom of the sea. I did not go crazy to blend out the colours. Just smooth enough.


STEP 2

BLENDER INK (or Rubbing Alcohol )

Surface of the ocean, I dropped few blender refill to create beautiful organic shapes. Normally  I use rubbing Alcohol and It works the same and much more economical.


STEP 3

BLENDER 00


On the bottom part, I drew out water shadows with blender. It is better if you make it all different and random shapes. Larger shapes on the bottom and gets smaller as it goes to the middle part. 


STEP 4

Ecoline Watercolour ink 

Create some highlights on the surface of the water, sunshine shinning through the water. 


STEP 5

BLENDER (or Rubbing Alcohol +Brush )


Create Sunshine with blender. Smaller and whiter on top, it gets larger and fade out on the bottom. 


STEP 6

Ecoline Watercolour ink 

Create some highlights on the Bottom ocean.  


See you on the next video!

Tuesday, 28 June 2016

Unky's Colouring Therapy Season2 - Episode 7 - Underwater background 1 'Mermaid Call'


Hello there! , It has been a while! 
It has been a wonderful summer so far and so much more to come.
I just love play with water and watching what water create. It is just magical.

If I explain a little bit of process what I went through.

First I lay out and dropping some copic refil colours. 
different colours in this case. and I like mixing colours.
then I went with colour pencil adding more deep colour. you could totally do it with 
darker copic. I just prefer to use colorpencil and pigment. then I realized that I erased some parts that I made it too defined and some lights that shines through the water. ( never afraid to make mistakes :P)

I use rubbing alcohol or blender to create water surface shapes It can be more lose shapes. In my case I kind of did more of diamond shapes all over. Just to remember it has to be Biger on the top ( considering it is closer to us ) to smaller as it goes down (far). 

Finally define whiter with white colour pencil whiter from top and fade off as it goes down.
then little more highlight is added with white water based ink and shinny dots. 

Always feel free to ask any questions. I am happy to answer for free! :)
And, Please If you like this video and someway helpful to you?
Please subscribe to my youtube channel! and Like and share! 

The Full colouring looks like this. 


Happy Colouring!
xxx
Unky


Tuesday, 3 May 2016

Unky's Colouring Therapy Season2 - Episode 6 -'Fung la'


Introduction
This image is I have released on May 1st as a freebie!
the model of the image is one of my good friend's girlfriend. she is fashion model in Vietnam.
I follow her on instagram and she has really pretty face and especially with big eyes and full lips. :)
sometimes when I like the sketch it looks so different because I usually add shadows on the sketch and without it, it just look different. 

Paper 
I used high quality watercolor paper. I think it is hot pressed watercolour paper. but I was gifted to me so I can't tell exactly what brand and how many gram and so on. However it is a good quality paper and I like how it takes copics and colour pencil. and yes, quality of paper does effect pigment especially, when you add layers of colour pencils, in my opinion. 

Colouring tips
So I started with adding base tone. I usually choose something toned down colour such as a grey or dark coral.. I used E04 which looked like Dark coral to me.  I usually go kind of loose when I fill up tones with copics and I think It gives me a good speed and helps looking at the piece as whole. 

References
It is nice to have a reference photos, I usually have few fashion magazines near my art table. It is very handy to look through for the face. once I find the one picture that I like, I sort of stick with it and try not to look at too many photos.

Touching up. and finish.
I normally use white ink or gelpen to highlight some blings and sparkles.
I like the glossy look and how it stands out. and on this one, I added some lose hair around with black pencil. 

OKAY, Hope you enjoyed the video!
again, I appreciate the face that you came to visit here and watch it. 
The connection means a lot to me. 

-Namaste-

Wednesday, 20 April 2016

Hair Heaven Colouring book test vol.3: COPIC + Colourpencil


I would like to share colouring another page of Hair Heaven
Siesta III Also available in Digital stamp.


Idid more details focus on Face and Leave the rest colours 

Hope you like the video! :)


You can get a copy of Hair Heaven on Amazon Click HERE


Saturday, 12 March 2016

Hair Heaven Colouring book test vol. 2 : COPIC + Colourpencil


Okay Second colouringbook Alcohol markers + colorpencils Demo 
The Image also available on TheEastWind Etsy shop


:) ENJOY!


Copics and Colour pencils I used 


+


Plus Rubbing Alchole 
and Gelpen.


Thank you for Watching!


You can get a copy of Hair Heaven on Amazon Click HERE

Friday, 26 February 2016

Hair Heaven Colouring book test vol. 1 : COPIC + Colourpencil

Here I am Finally Brought a Video recorded for a demo. 
This is one of the page Aurora Siesta IV
I laid down base tone with copic, then I find details with colour pencils! 
Hope you enjoy the video! 


Copics and Colour pencils I used 


+


Plus Rubbing Alchole 
and Gelpen.


Thank you for Watching!


You can get a copy of Hair Heaven on Amazon Click HERE

Tuesday, 16 February 2016

Hair Heaven Colouring book test vol. 1 : COPIC


Yes it is done! finally, 
And This 21st image 'TheEastWind Witchery'
It was my lifetime dream to have a Witchery.... home grown herb tinctures and selling colouring therapy books? How fun it would be right? that is how I came up with this image.

So I tried with copics and copic only.
and I was so worried cause the papers from my book is pretty thin.
and I saw many nasty complaints from same publisher's colouring book.
cause this one have pretty much one option for any book.
I'd say it is not impossible! I actually would say it is totally enjoyable. 
Only thing is there are lots, lots of hair on this image and I did get neck pain sitting and look down for long time. :) 

Copics I used. 


That white pen is Sakura gellpen for highlight.


Paper is thin so I put 3 Kraft paper card stock 
just to be sure there are no damage on next page


Close up shot here. :) 


Little tip I wanted to share when I colour.
I always keep in mind when I paint and colour.
that to have a focal point. most of the image 
yes it is girl's face and hair around face.
more vivid colour and more detail is used.
It makes the end result more interesting and dynamic. 

*

I am working on second book now in Korean theme.
:) lots of hanbok Korean dress with girly images 
I have sketched and working on it. 

Thanks for checking out.

*


You could grab a copy HERE 
With 30% OFF coupon code :  4ML3ZRU7


Thursday, 4 February 2016

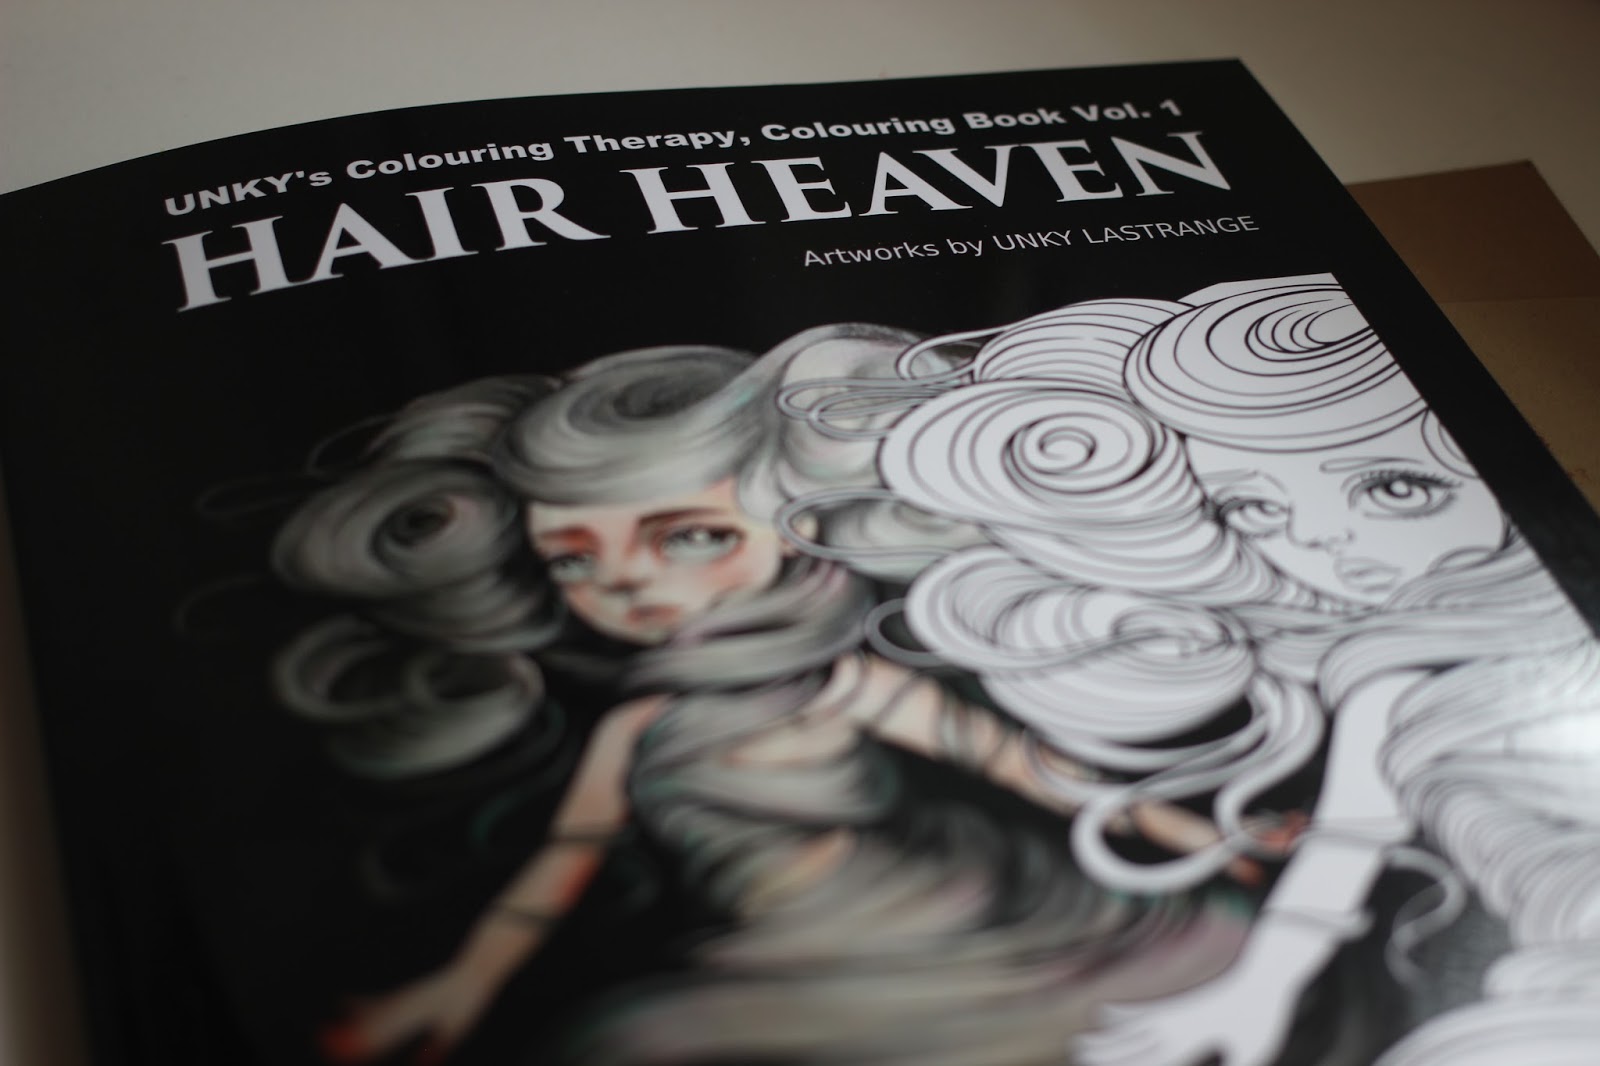
Hair Heaven /UTC Colouring book Vol.1 - Interior Tour -


So, finally I got my proof. 
and It looked fine. so I decide to make it available everywhere.


HOW MANY ARTWORKS?
30 artworks on the book. 

I picked out 30 images that fit best to Hair Heaven,
you can look at the video what images are on the book.


QUALITY OF PAPER
The paper is 60g white paper.

This topic was the biggest set back for me to release through createspace.
However as I spent a lot of time checking other companies, 
and the price point goes way too high. just to print, it starts from 10+ dollars. 
I will keep looking for improvement of better quality paper.
I'd say, it is not ideal for copic markers. 
I suggest photocopy the image on your favourite paper in that case.
However I will make follow up videos 
try on copics and different mediums as well. 


IS IT ONE SIDED?
YES! IT IS ONE SIDED.

IS IT AVAILABLE IN DIGITAL?
It is Not available in digital form.

Most of the images are available in digital form on TheEastWind Etsy shop 
Digital stamps are 'Original' file of the images that is on this book.
It is hand sketched > inked on computer (digitalized) with 300 dpi resolution.
which is original file that I vectorized for this book.
 I hope you understand. 

WHERE TO BUY

The book is 11$ everywhere. However, 

You can grab this today with 3$ Off using couponcode: FXQ3E2PV 


Here on Createspace : https://goo.gl/jxnmOc


Coupon doesnt work on Amazon. I guess I can't make couponcode for amazon


Wednesday, 13 January 2016

UTC Season2 - Episode #4


Hi Ladies, Today's UTC 
I Used 
Digital Stamp: Twistedvenus 'Spanish Guitar'
https://goo.gl/yLuime


Please enjoy <3 

Saturday, 26 December 2015

UTC Season2 - Episode #3


Long time no video ladies,
I recored this a while ago but finally put it together!
Hope you enjoy it and Have a happy new year!
xxx

This image is called  Lucy Loo 'Morning Stretch'


Tuesday, 3 November 2015

UTC Season2 - Episode #2 - A, B


Hi~ It is November and It is time to enjoy 
all the christmas crafting fun!!


This Episode has two videos :)
Betty and I prepared an collaboration event over at Facebook
so you can get these digis for only 1$ during event period.

If you like to join the fun  and get these digis for 1$? click Here for more detail!

Betty's Stamp 'Gothic Elf'
www.simplyBstamps.net


TheEastWind, Lucy Loo 'Creepmas'


Monday, 26 October 2015

All That Might Have Been by Nightsparklies - Lost Parchment #15


*All That Might Have Been* by Nightsparklies 
- Lost Parchment #15


And here is one of my absolute favourite images by Unky!


***

All that we might have been
was but the elegance of frosted roses
and broken champagne glasses
was but the tears upon velvet carpets
and sparkly candy wrappers
littered above the sea of my heart
you had once sunk into the embrace of
my soft hide, where there was no escape
All that we might have been

***

Monday, 19 October 2015

Mad Hatter by Nightsparklies - Lost Parchment #14


*Mad Hatter* by Nightsparklies - Lost Parchment #14


I am back :) Enjoy your spooky autumn and make sure to have lots of cookies and candies while you do! Here's a little something pre-Halloween:


***

Oh, I remember when there were more
rabbits than holes

and the dreams were darker than the skies
*
Oh, I remember when the mad hatter
told me to go forth
and carry his burden until the end of the day
*
Oh, I remember sweet, sweet Alice
her dress like velvet
and her hair spun about her like threads of gold
*
Oh, I remember when colour and insanity
cookies and caterpillars
they all fell into one wonderful, amazing fantasy


***

Friday, 9 October 2015

UTC Season2 - Episode #1


Hi Ladies! 
It has been few month since last video! 
How is everyone doing and colouring going?! 
Oh yeah I have been watching you colouring over at facebook group! and I love to see it everytime and get inspired! 

So, I am going to do another year with Unky's colouring therapy.
This season, I decided to make video every two weeks.
will be released on 10th and 25th until 2016 June. 


I have used a digi called Baby Aurora 'Witch and a Kitty'  
We are running a mini colouring contest over at TheEastWind Facebook Community group with this image and you will find the link to buy this for 1/2 price for this month!


 If I show you a closer look, 
I like to limit number of colours when I colour,
I did mainly black and grey for the baby Aurora, 
and bright blue for background.


Materials:

Skin: E00, E11 (copic numbers)
Dress :C5 C8
Boots:V15
Pumpkin:YR02, Faber-Castell Polychromos 9201-121***, 9201-104***
Chick: R20
Broom :E15,E11
Eyes:BG13,BG10
Mouth:R37
Hair :B41 
Background: B26

+Black pencil ( faber-castell polychromos 9201-199) 
Rubbing Alcohol +water for background.
Wood panel from dollarstore
Mod Podge for glue and glaze.


Hope you enjoy the first episode xxx
Unky 


TheEastWind 2000+ Likes Giveaway


Special event over at TEW facebook page :) 
We have reached 2000 admires! yay!
I appreciate every single one of you who cared to press like button, 
This giveaway is super special! 
Our DT ladies are sending the winners their inspirations! 
7 Designers from TEW gladly participated their creations and I am sooo very grateful.
Please come over at TheEastWind facebook page 
and join our giveaway!